

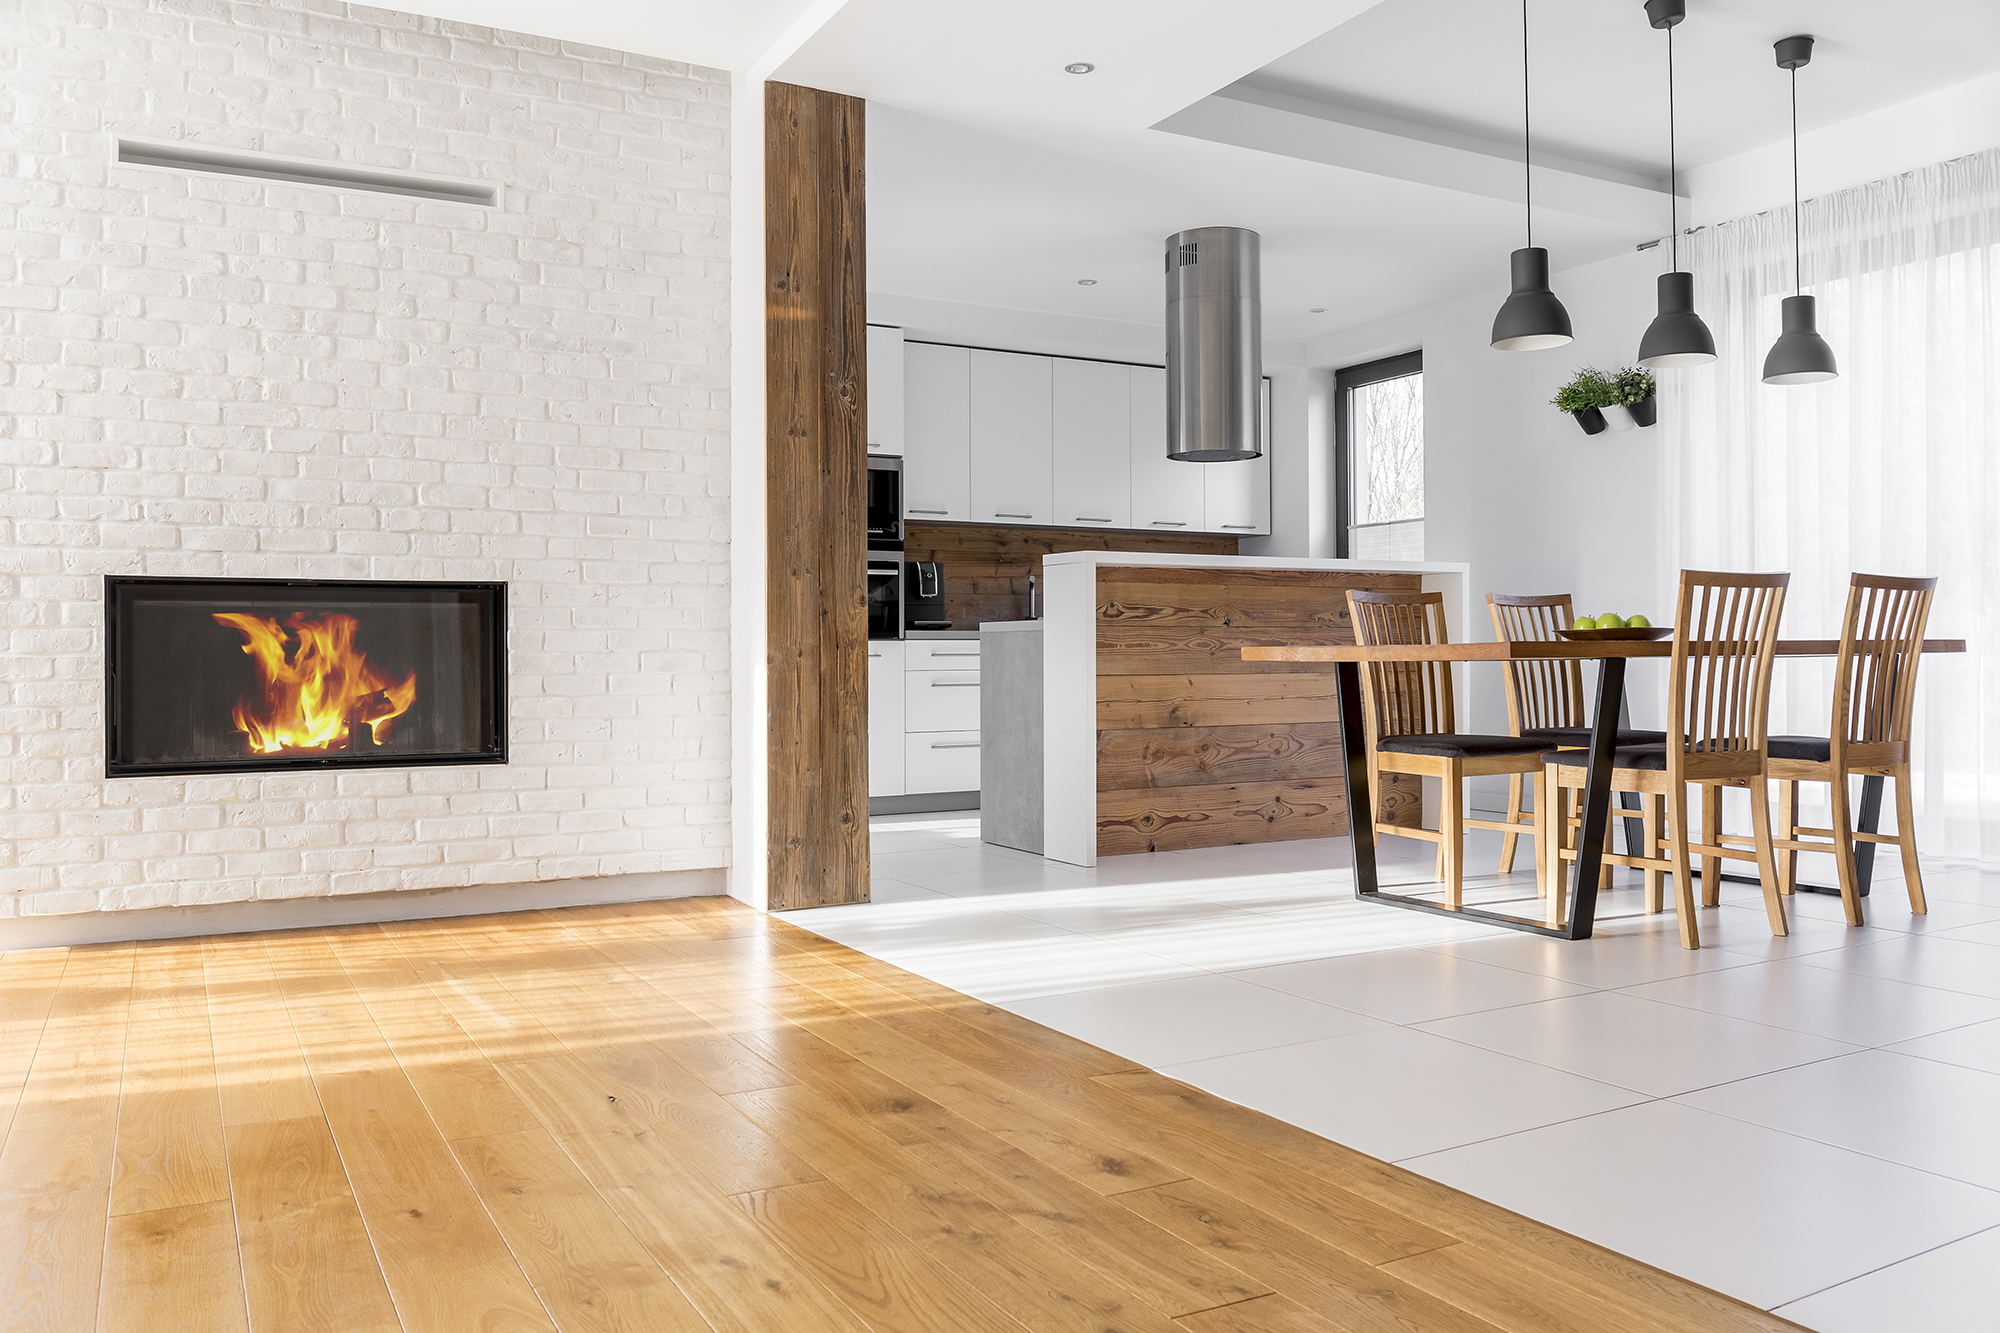
Transition strips are the small “in-between” parts of a floor that can make the whole home feel either seamless… or permanently unfinished. They also fail in the most annoying ways: rocking underfoot, snagging socks, popping loose after a season, or creating a ridge right where a door swings. If you’re upgrading hardwood or tile, Dungan's Floors can help you plan transitions with the same intention as the main flooring at McKinney, TX. Because the detail you step over 30 times a day deserves grown-up engineering.
Step one: measure the height difference like a pro
Before choosing a profile, measure:
Finished floor height A (top of surface to subfloor)
Finished floor height B
Delta (A minus B)
Door clearance (bottom of door to finished height)
Traffic direction (which side people approach from most often)
A transition strip should solve the delta without creating a steep ramp or a toe-stubber.
Pick the right transition type for the job
1) T-molding (same-height floors)
Use for hardwood-to-hardwood or LVP-to-LVP when heights match closely.
Common failure: People use a T-mold for a height difference and it rocks, leaving gaps that collect dirt. If there’s a real delta, use a reducer.
2) Reducer (height differences)
Reducers are designed to taper from a higher surface down to a lower surface.
Technical sanity check: The taper should be long enough that the slope doesn’t feel abrupt. Short, steep reducers are a trip hazard, especially in socks.
3) Threshold / saddle (doorways and wet zones)
Best at exterior doors, bathroom entries, and where you want a hard “stop” that also handles moisture transitions.
Pro move: Choose a material that matches the exposure: moisture-prone areas often prefer stone/porcelain thresholds or properly sealed pieces.
4) Metal profiles (tile edges and clean modern breaks)
Tile-to-anything transitions often look best with a metal profile that protects the tile edge and provides a crisp line.
Mistake to avoid: Using a profile that’s too shallow for your tile thickness + mortar bed. If it doesn’t support the edge, grout cracks and chipping can follow.
Door clearance: the detail that makes transitions look “wrong” even when they’re right
A transition can be perfectly selected and still fail the door test.
What to check
Swing path: does the door sweep over the transition?
Undercut: are the jambs/trim undercut so flooring slides under cleanly?
Rugs/mats: will a bath mat or runner push into the door clearance?
Best practice: Plan transitions and finished heights before install day, so you don’t end up shaving doors or compromising with a thinner profile that fails later.
The hidden enemy: movement and expansion
Different materials move differently:
Hardwood expands/contracts with humidity
Tile is stable, but the substrate beneath it moves
Concrete slabs transmit seasonal moisture that affects adjacent materials
A transition should allow each material to do its thing without forcing a rigid bond between them.
Failure mode #1: Hardwood pinned tight to tile with no movement gap
Result: buckling, gapping, or squeaks at the edge.
Failure mode #2: Transition glued rigidly across a movement joint
Result: adhesive shear, strip pops loose.
Fastening and bonding: why transitions “pop”
Transitions fail less because of bad luck and more because of wrong attachment for the substrate.
Common attachment methods
Track + snap-in transitions: Great for some floating floors, but must be installed on a clean, flat substrate.
Construction adhesive: Works, but only when substrate is sound and the strip is properly supported.
Screws/anchors: Often best when you need mechanical hold (especially over concrete), but must be planned so fasteners don’t interfere with underlayment systems.
Pro rule: A transition should be supported underneath. If there’s a void under the strip, it flexes, then breaks adhesive bonds, then rocks forever.
Seam failures: how to prevent the ugly line that opens up later
If a transition meets at an angle or spans a wider opening, seams matter.
How seams fail
Poor miter cuts
No backing support under the seam
Expansion pushing pieces apart
Adhesive shrinkage or inadequate cure conditions
How pros prevent it
Use manufacturer-matched corners/end caps when possible
Provide solid backing under seams
Leave correct movement gaps on wood products
Avoid spanning “soft” underlayments without proper support
Make transitions feel intentional, not apologetic
Transitions look best when they match the home’s style:
Modern: slimmer profiles, metal edges, clean lines
Traditional: wood reducers/thresholds that blend with trims
High-contrast design: deliberate contrast transitions that feel like a frame, not a patch
The best transitions disappear under your feet and reappear only when someone compliments how “finished” the home feels. If you want transitions that handle height differences, respect door clearance, and avoid seam failures long-term, contact Dungan's Floors or visit McKinney, TX. We proudly serve Mckinney, TX, Allen, TX, Plano, TX, Princeton, TX, Prosper, TX, and Celina, TX.


